Wednesday, February 28, 2018

Fresh Tomato and Goat Cheese Pasta

Do you want something easy, light and quick? Then try this Fresh Tomato and Goat Cheese Pasta for dinner. It only takes 17 minutes!  Serves 4-6

Ingredients:

12 oz of angle hair pasta
2 large or 3 medium tomatoes, sliced then quartered
1/4 cup olive oil
3 medium garlic cloves, minced
4 tablespoons fresh parsley, chopped
Salt and pepper, to taste
1/4 cup shaved or shredded Parmesan cheese, divided
4-6 oz goat cheese, crumbled
Fresh basil, chopped or dried basil, sprinkled on for garnish (optional)


Directions:

In a medium size nonmetal bowl combine the tomatoes, garlic, parsley oil, salt and pepper; mix well. Let the tomatoes sit at room temperature while you make the pasta according to the package instructions. 


When the pasta is done drain all but 1/2 cup the the pasta cooking water. Immediately add the hot pasta to the bowl with the tomatoes, stir to combine. 

Add reserve pasta water, goat cheese and 1/8 cup of Parmesan cheese. Toss until evenly blended. Top with remaining Parmesan cheese and basil (optional). Serve. Yum Yum!

Tuesday, February 27, 2018

Japanese Sweet Potato Ice Cream

I went to Whole Foods to try and find the Ube Purple Yams and grabbed Japanese Sweet Potatoes thinking they were the same thing. Well to my surprise as I was peeling them, they were not purple inside but a cream color.

Still very sweet compared to our orange variety, I decided to see if the Japanese used them to make ice cream, and they do.

You’ll need a food processor and ice cream maker to make this recipe.

Ingredients:

2 1/2 cups heavy cream
1 cup whole milk
3/4 cup dark brown sugar
5 egg yolks
1 cup Sweet potato purée
1/4 teaspoon nutmeg
3/4 teaspoon cinnamon


Directions:

Heat the milk, cream and sugar in a medium size saucepan until it starts to boil and the sugar is dissolved.  In a bowl whisk the egg yolks slowly then pour the hot milk mixture about a cup at a time whisking constantly. Once all the milk has been poured into the bowl then transfer it back into the saucepan, continue to whisk until it thickens and coats the back of a spoon. Do not boil.

Strain the mixture through a fine mesh sieve into a bowl, combine with the sweet potato purée and spices. Cover and refridgerate at least for 3 hours. Put into an ice cream maker and process according to the manufacturer’s instructions. When done place in a freezer safe container and freeze for 2 hours.

PS: To make sweet potato purée peel, clean and cut up your potatoes. Boil the potatoes until they are fork tender. Place them in a food processor and process until smooth.

Leek and Tarragon Chicken Pot Pie

I’m suppose to make this Leek and Tarragon Chicken Pot Pie in my cooking class at the end of the month. I thought I’d get a heads up and see what I’m getting myself into, because like many of us, me included, have never made a pot pie before, especially one from scratch.

I don’t know if this recipe is exactly the one we’ll be using, but at least I’ll have some idea of what I should expect. This recipe would be great for leftover chicken. Serves 6-8 

This recipe uses a pie dish, but I don’t see why you couldn’t use ramekins for single servings. You’ll just need extra puff pastry sheets. What do you think?

Ingredients:

2 cooked chicken breasts, cut in bite size pieces
1/3 cup butter
1 leek, cleaned and chopped
3 tablespoons flour
1 1/2 cups chicken stock
1/2 cup heavy cream
1/2 teaspoon dried tarragon or 1/4 cup fresh tarragon, lightly minced 
Salt and pepper, to taste
2 sheets of frozen puff pastry, thawed
1 egg, lightly whisked


Directions:

Preheat your oven to 375F/

Melt butter in a saucepan then add chopped leeks and sauté until soft, about 5 minutes. Add the flour and combine, remove from heat. Gradually add in the stock, whisk until smooth, return to heat. Keep whisking until it bubbles and thickens, remove from heat. Whisk in the cream, tarragon, salt and pepper. Add in the chicken pieces and set aside to cool.

Pour the chicken mixture into a pie dish.  Brush the edge of the pie dish with the egg and lay the a sheet of puff pastry on top (if you need 2). Crimp the edges and remove any excess or cut the 2nd piece in strips and wrap around edge then crimp the sides and top together. Cut an X in the top so the steam can excape and brush the top with the egg. Bake for 30-40 minutes or until it turns a golden brown. Serve hot. Yum Yum!

PS: I’ll add the cooking class recipe and hopefully a picture. I think some mushrooms would be great in this pot pie. What would you add?

Update March 24, 2018

I did not get a picture 🙁, but these are the ingredients we added:
2 cups of carrots, diced
4 teaspoons minced garlic (4 cloves)
8 oz cremini mushrooms, sliced
1 10 oz package of frozen peas 
6 tablespoons cream sherry 

The carrots need to be cooked with the leeks until they begin to soften. Then add in the garlic, mushrooms and tarragon cook for 5 minutes. Add in the sherry before the flour and scrape off the brown bits or fond on the bottom of the pot. Then add flour after sherry has evaporated and bring to boil to thicken. Once thicken add in the cream, peas and chicken. Check to see if it needs more salt before topping with puff pastry. We also used a 3 quart baking dish. 

Copycat IHOP Buttermilk Pancakes

It’s National IHOP Pancake Day!

The International House of Pancakes is offering customers a free short stack of buttermilk pancakes between 7am and 7pm Tuesday, February 27 at its locations in the United States, Canada, Puerto Rico, Guam, and Mexico. You have to dine-in to take advantage of the deal.

IHOP has been celebrating the day since 2006. While each stack of pancakes is free, the pancake chain is asking guests to please consider leaving a donation for the meal that will then be donated to a local children’s hospital and other health organizations.
You can go to IHOP to get theses free pancakes or you can make some at home. Makes 10 4” pancakes.


Ingredients:

1 1/4 cup flour
1 teaspoon baking powder
1 teaspoon baking soda
1 egg, beaten
Pinch of salt
1 1/4 cup buttermilk *
2 tablespoons butter
1/4 cup sugar

Directions:

In a medium size bowl combine the flour, baking powder, baking soda and salt, mix well. In another bowl beat the egg and add in the buttermilk, mix well then add the egg mixture into the dry ingredients. Stir until smooth. Add in the melted butter and sugar. Fry on a greased griddle. Serve hot with your favorite toppings. Yum Yum!

* Don’t have buttermilk. Just add 1 teaspoon of white vinegar to a cup of milk. Let sour for 5 minutes. This recipe calls for 1 1/4 cup of buttermilk so you can use 1 1/4 cup milk with 1 1/4 teaspoon of white vinegar.


Sunday, February 25, 2018

Ube Purple Yam Ice Cream

Ube is a purple yam. It is pronounced ‘oooh-beh’. It’s a tuber that grows above ground, abundant in the Philippines, Indonesia and in other Southeast Asian countries. 

You’ll get hooked by the sweet, almost almond, nearly havelnut flavor and get mesmerized by its soft purple color. When you buy ube in the store, you can easily walk past them, because they look like an ordinary large sweet yams. They even have the same rough, thick, dark outer skin, but inside the purple yam’s flesh has a soft pink tinge. 

You’ll need a food processor and an ice cream maker. Makes 1 quart. 

Ingredients:

1 1/2 cups or 8 oz Frozen boiled ube, from an Asian store
Or 1/2 lb (2-3) purple yams, peeled, boiled and mashed
1 1/2 cups whole milk, divided
1 tablespoon cornstarch 
3/4 cup coconut milk, preferably canned from Asian store or supermarket Asian isle
1 cup heavy cream
1/3 cup granulated sugar 
1/3 cup brown sugar 
1/8 teaspoon salt 
1 teaspoon vanilla extract 

Directions:

Thaw frozen boiled ube,that is already mashed, almost to room temperature (still cool to touch). Drain in a colander to remove any excess liquids. Refrigerate until ready to use. 
Or
If you are using whole purple yams and have already peeled, boiled and mashed them, let them cool then refrigerate them.

In a small bowl combine 2 tablespoons of the milk with the cornstarch. Whisk until the cornstarch is blended and there are no more lumps. Set aside. 

In a medium size saucepan combine the remaining milk, heavy cream, coconut milk, sugars and salt. Mix well. Over med/high heat bring the mixture to a boil, then lower heat to simmer until the sugar dissolves, about 3 minutes.

Take the milk mixture off the stove and slowly whisk it in the cornstarch mixture, return it to the saucepan and cook it over med/high heat until it thickens, about a minute. Stir continuously so the mixture does not stick to the bottom of the pan. 

Remove the saucepan from heat. Let mixture cool by setting the pan the a bowl filled with ice water. Cool for 20 minutes and whisk every now and then. Transfer mixture to an airtight container and refrigerate 4 hours or overnight. 

Next combine 1 1/2 cups of the chilled ice cream with the mashed ube. Use a food processor and pulse for about 5 minutes until the ube incorporates into the milk mixture. Pour the entire cream base into an ice cream maker and churn according to the manufacturer’s instructions. When done transfer to a freezer-safe container and freeze at least 4 hours or until firm.


Saturday, February 24, 2018

Copycat Twin Peaks Blackened Chicken Quesadilla

Have you ever watched the show Twin Peaks? Well I’m pretty sure this restaurant isn’t named after the show.  It’s more like Hooters in a northwest hunting lodge with maybe 200+ TVs.

I’ve went to one recently and my lunch date said this blackened chicken quesadilla was the best quesadilla he’s ever tasted. I’ve got to try one. What better way then making one for my self. You’ll need a baking sheet and a cast iron skillet to make this recipe. Serves 1


Ingredients:

2 flour tortilla

Nonstick cooking spray
1 chicken breast, cut into bite size pieces and blackened
Spices for blackened chicken:
   1/4 teaspoon paprika
   1/8 teaspoon cayenne
   1/8 teaspoon cumin
   1/8 teaspoon dried thyme
   Dash of garlic powder, salt and pepper
Pepper Jack and cheddar cheese, shredded
1/2 teaspoon olive oil
Corn, roasted
Spices for roasted corn:
   Dash of chili pepper, salt and pepper
Black beans
Green chilies, mild

Sides:


Fire Roasted Salsa

Pico de gallo
Sour cream
Lettuce, chopped

Directions:


First we have to have blackened chicken. Preheat the oven 350F/175C. Lightly grease a baking sheet. Heat a cast iron skillet over high heat for 5 minutes or until it’s smoking hot. Mix together the spices. Spray a nonstick cooking spray evenly over the entire chicken breast, then coat the chicken with the spice mixture. Place the chicken in the hot skillet and cook both sides for a minute each to sear in the spices. Place the breast on the greased baking sheet and bake in the oven for 5 minutes or until it’s no longer pink inside.  After it’s cool enough to touch cut into bite size pieces. Set aside.


In the same skillet on med/high heat add a 1/2 teaspoon of olive oil. Once heated pour in your frozen or canned corn and cook 10-12 minutes or until the corn starts turning brown, stir continuously. Add your spices and mix. Remove from skillet and set aside.


In the same skillet (spray with the nonstick cooking spray, if needed) cook your tortillas on both sides. Then remove. Add one tortilla back in skillet the add your chicken, corn, black beans, green chilies and cheeses. Place the other tortilla on top. Cook 2 minutes then carefully turn it over to cook the remaining 2 minutes. Serve with the fire roasted salsa, pico de gallo, sour cream and some chopped up lettuce.


Fire roasted salsa you can make your own by broiling your peppers and tomatoes until they start to blacken, or you can buy some here.


Need a cast iron skillet?


Do you like these Blackened Chicken Quesadillas? (From the show Twin Peaks)


via GIPHY

Friday, February 23, 2018

Orange Crusted Salmon with Orange Beurre Blanc

Have you ever been to Mon Ami Restaurant in Port Clinton, Ohio? They used to serve an orange crusted salmon with orange beurre blanc over mashed potatoes. I don’t see it on their menu anymore, that’s a shame it was very good. No worry, we can whip it up at home and probably for half the cost. $25.00 at the restaurant. Serves 6

First you must make your orange beurre blanc sauce, a French sauce made with the following ingredients:

1 shallot, minced
4 fresh thyme
3/4 cups dry white wine
1 tablespoon white wine vinegar
1 tablespoon orange juice
1/2 cold unsalted butter, cubed
1 teaspoon orange zest
Pinch of salt and pepper

Directions:

In a saucepan bring the shallot, thyme, white wine, white wine vinegar and orange juice to a boil; boil until reduced to 2 tablespoons, about 5 minutes. Discard thyme: reduce heat to low, add the butter one cube at a time, whisk until it melts before adding another cube. Stir in orange zest, salt and pepper. Cover and keel warm.

Ingredients:

6 skinless boneless salmon filets
1/2 cup panko bread crumbs
3 tablespoons of olive oil
3 tablespoons of dried parsley
2 tablespoons orange beurre blanc

Directions:

Preheat your oven to 425F/200C. Line a baking sheet with foil and spray it with a nonstick cooking spray.

In a medium size bowl add in the bread crumbs, the parsley and the orange beurre blanc, mix well.

Place the salmon on the baking sheet, press in the bread crumb mixture to make it stick. Bake 15-20 minutes, just until the salmon is cooked throughout and the breadcrumbs are a golden color. Serve on top of mashed potatoes or rice and with your favorite side. Yum Yum!


Thursday, February 22, 2018

Dutch Oven Chicken and Vegetables

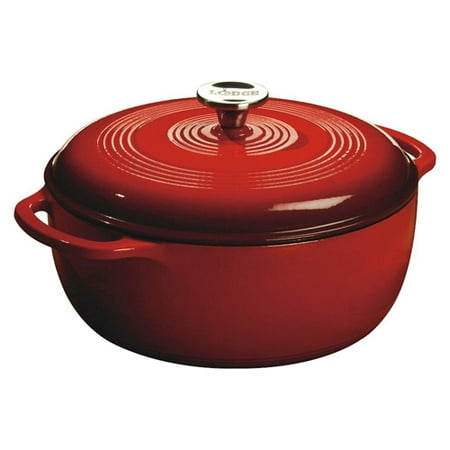
I haven’t used my Dutch Oven in a while, so I thought I’d make this Dutch Oven Chicken and Vegetables. I suppose you could use whatever vegetables you have, but I’m going to use the usual potatoes, onions, carrots and celery, your typical mirepoix. Serves 4 ...oh you’ll need a Dutch Oven to make this recipe.

Ingredients:

4 chicken breasts
1 cup flour
1 teaspoon black pepper
1 teaspoon garlic powder
1 teaspoon paprika
1/4 cup olive oil
3 garlic cloves, minced
1 medium onion, chopped
3 stalks of celery, cut into1” pieces
5 medium carrots, cut into 1” pieces
5 medium potatoes, quartered (depending on size)
1 1/2 cups chicken broth
1 tablespoon herbs de Provence
1/2 teaspoon rosemary
Salt and pepper, to taste

Directions:

Preheat oven to 375F degrees.  In a medium size bowl add the flour, pepper, garlic powder and paprika; mix well together. Dredge the chicken breasts in the seasoned flour, coat each thoroughly

Heat the olive oil in the Dutch Oven over medium heat. Once the oil is hot add the chicken breasts, two at a time. Fry until they are just brown on the outside, don’t cook through. Remove and set aside on a paper towel to drain. Repeat with the other two breasts.

Now that the breasts are removed add in the garlic, onion and celery; stir until the onions are translucent. Add in the carrots and potatoes and stir to combine.  Place the chicken breasts on top of the vegetables and sprinkle on the herbs, salt and pepper to taste. Pour the chicken broth over top and cover with the lid.

Place on the middle rack of the oven and bake covered for 30-45 minutes or until the carrots and potatoes are tender. Remove from oven and serve. Yum Yum!


Wednesday, February 21, 2018

Shrimp Salad with Avocado Ranch Dressing

I’m sure this Shrimp Salad with Avocado Ranch Dressing will look familiar to some of you, especially for those that lived or visited Sandusky, Ohio in the ‘80’s. A well known restaurant during that time was Fanny Baer’s Restaurant on Milan Road. They specialized in seafood and steak.

Every time I went I ordered this salad. What made the salad extra yummy was the dressing. Many say that it’s a Green Goddess dressing, but if you search for that dressing you’ll find it has different ingredients, such as anchovies, watercress, avocado or a bunch of food coloring just to make it look green.

We are going to make a homemade avocado ranch dressing that I think is more like the original dressing used at the restaurant.

If you’ve never tried this shrimp salad, hold onto your hat, because if you love shrimp, you’ll love this salad. Serves 4


Ingredients:

1 head of lettuce, cleaned
1 8 oz bag of bay shrimp
I’d purchase this, because it’s already prepared for a salad:

1-2 can(s) of mandarin oranges
2 cups of toasted coconut
2 cups of almond slivers
Avocado ranch dressing

Directions:

In 4 salad bowls evenly divide the head of lettuce. Top lettuce with the shrimp, then the mandarin oranges. Sprinkle on the toasted coconut and almond slivers. Drizzle on the avocado ranch salad dressing.

To toast the coconut:
   Preheat oven to 325F. Spread coconut flakes evenly on a baking sheet in a thin layer. Bake 5-10 minutes. After a few minutes stir the coconut to ensure it gets toasted evenly.


Avocado Ranch Dressing (yields 2 cups)
Ingredients:

2 large ripe avocados
1 cup Buttermilk, divided
1/4 cup Mayonnaise
1/4 cup sour cream or plain Greek yogurt
2 tablespoons white wine vinegar
1/4 cup parsley
2 green onions, sliced
2 tablespoons chives
1 garlic clove, minced
1 teaspoon dill
1 teaspoon salt
1/2 teaspoon pepper
Juice from 1/2 of a lime
1 teaspoon honey, optional

Directions:

Scoop out the flesh of the avocado and put it in a food processor with 1/2 cup of buttermilk and all the rest of the ingredients. Pulse until smooth. Add in the remaining buttermilk a little at a time until you get your desired consistency. Keep in an airtight container. Will keep in the refrigerator up to a week.

Tuesday, February 20, 2018

Salisbury Steak Instant Pot or Not

My granddaughters love Salisbury steak, but they are used to the more traditional method of cooking it (bottom picture). Since I got my mini Instant Pot I’ve been trying to convert my recipes for a pressure cooker. Not only is it faster to cook, but there is less to clean up. Sometimes, yes, sometimes the prep work is more for the Instant Pot, so let’s compare these two recipes and see which one is better overall.

Instant Pot Salisbury Steak (top left picture)
Prep Time: 15 minutes
Cook Time: 30 minutes
Total Time: 45 minutes
Serves: 6
Ingredients:

1 1/2 lbs ground beef
1 tablespoon whole milk
1 tablespoon Worcestershire sauce
1 clove garlic, minced
1/3 cup panko bread crumbs
Salt and pepper, to taste
1/2 teaspoon smoked paprika
1 tablespoon butter

Mushroom Gravy:

8 oz baby Portobello mushrooms, sliced
1 medium onion, thinly sliced
2 cups of beef broth
1 tablespoon tomato paste
1 tablespoon Dijon mustard
2 tablespoons fresh parsley, minced
1/2 teaspoon thyme
2-3 tablespoons water
2-3 tablespoons cornstarch
Salt and pepper, to taste

Directions:

In a medium size bowl add the first 7 ingredients together by hand and form 6 hamburger patties.
Let sit while you slice your mushrooms and onions. In a small bowl whisk the gravy ingredients together; beef broth, tomato paste, Dijon mustard, parsley, thyme, salt and pepper.

Set the Instant Pot on sauté and add the butter. When the butter melts brown the patties on both sides. Remove and set aside. Add in the mushrooms and onions and sauté lightly for 2 minutes. Add in the beef broth mixture and scrape the bottom for any flavorful bits. Add the patties on top of the mushrooms and onions.

Cancel the sauté method. Put the lid on the Instant Pot, make sure steam valve is closed. Pressure cook for 15 minutes. When the cooking ends use the “natural release” method for 15 minutes. After 15 minutes release any steam before opening the lid. Remove the steak patties.

Combine the cornstarch and the water, mix well then add it to the liquid in the Instant Pot. Whisk it with your flat whisk to avoid any lumps for 5 minutes to thicken. Pour gravy over steak patties and serve over mashed potatoes, rice or egg noodles. Yum Yum.

Stove Top Salisbury Steak
Prep Time: 5 minutes (a little low for dicing and slicing)
Cook Time: 30 minutes
Total Time: 35 minutes
Serves: 6

Ingredients:

1 1/2 lbs ground beef
3 tablespoons dried onion flakes
1/2 teaspoon low-sodium beef bouillon granules
3/4 teaspoon onion powder
3/4 teaspoon parsley flakes
1/2 teaspoon celery seed
1/2 teaspoon paprika
1/2 teaspoon ground black pepper
1/2 cup Italian seasoned bread crumbs
1/2 cup milk
1/2 cup flour

Mushroom Gravy:
3 cans of cream of mushroom soup
3/4 teaspoon low-sodium beef bouillon granules
3 tablespoons Worcestershire sauce
3 cups mushrooms, sliced
1 1/2 onion, diced
3/4 cup water

Directions:

In a large bowl mix together the first 10 ingredients, don’t over mix. Form into 6 patties. In a large nonstick skillet heat over med/high heat and spray with Pam or another nonstick cooking spray. Dredge the patties in flour to coat. Brown the patties on both sides. Remove to paper towels to soak up any grease. Drain grease from pan. Use the same skillet to mix the gravy ingredients, stir well. Add the patties back in the skillet and cover with some of the gravy. Turn heat down to medium/low. Cover and let simmer for 15-20 minutes. Serve on mashed potatoes, rice or egg noodles. Yum Yum!


Monday, February 19, 2018

Skirt Steak with Peppers and Onions

My mouth is watering just thinking about this recipe. It’s a recipe that’s not really a recipe....I have a skirt Steak and an onion, half of a green pepper and a jar of red roasted peppers and I’m thinking I could stir fry it or I can pan fry it and make an easy pan sauce made with wine and beef broth. Ummmm, which sounds better?

So, this Skirt Steak with Peppers and Onions recipe is more about making the easy pan sauce, don’t you think? Serves 2

What you needs is a large nonstick skillet and the following ingredients:

3 tablespoons olive oil or ghee, divided
1 14oz skirt steak, sliced in half lengthwise (along the grain) the cut into thin strips (across the grain), w inches long and 1/4 inch wide. It is easier to slice if steak is partially frozen
1 yellow or while onion, sliced in half moons
1/2 green pepper, sliced lengthwise
1/2 jar of roasted red peppers

Easy Pan Sauce:
1/4 cup white wine
3/4 cup beef stock
Splash of heavy cream or 2 tablespoons butter
1 1/2 teaspoon corn starch and 2 tablespoons water, combined (optional)
Salt and pepper, to taste

Directions:

In your large nonstick skillet on med/high heat add your 2 tablespoons of olive oil or ghee. When hot add in the onions and green peppers, cook to soften or when onions are translucent. Remove and set aside.

Add in the remaining tablespoon of oil or ghee, if needed to sauté your steak. Cook to your desired temperature. Skirt steak is best with a pink center. Remove and set aside.

Remove all but 1 tablespoon of the remaining oil in the skillet. (Do not clean). Keep heat at med/high. Pour in the wine. Scrape the brown bits on the bottom of the skillet. Let the wine reduce by half, about 3 minutes. The pan should almost look barely dry. Pour in the broth and let it come to a rapid simmer. It should reduce to about 1/2 cup. Reduce heat to medium.  Add in the cream or butter, stir (until butter has melted) At this point you can decide if you want a broth-like consistency or more like a gravy. If you want a gravy consistency add in the corn starch/water mixture. If it becomes too thick add in more beef broth.

Add the steak, green peppers, onion and the roasted red peppers to the skillet; stir to combine with the sauce. Let cook 3-5 minutes to reheat the steak and vegetables. Salt and pepper, to taste. Serve on rice or with your favorite sides. Yum Yum!


Sunday, February 18, 2018

Easter Bunny Cookies

Easter feels like it’s early this year, April 1. I thought it would be cute to add some Easter Bunny Cookies in the granddaughter’s Easter baskets this year instead of a big chocolate bunny. I know it’s not the same, but these are soooo cute.

You’ll need large and small bunny-shaped cookie cutters,
Large resealable plastic bags, pastry bag fitted with a fine tip, bamboo skewers and a box or basket. Makes 3 dozen.

Ingredients:

Cookies:
1 package of sugar cookie dough
3/4 cup flour

Icing:

3 cups powdered sugar
1/2 teaspoon lemon juice
2 tablespoons powdered egg white
6 tablespoons warm water
Pink, green, yellow blue food coloring

Directions:

Preheat your oven to 350F. In a medium size bowl combine the cookie dough and the flour. Adding flour gives the dough a better texture and keeps the cookies from puffing up too much in the oven.

On a lightly flowered surface, using a floured rolling pin, roll the dough to a 1/8 inch thickness. Using the large and small bunny cookie cutters, cut out the shapes and place them on an ungreased baking sheet. Reroute the dough scraps and continue cutting out shapes. Bake the cookies until golden, about 9 minutes. Transfer cookies to a wire rack to cool completely.

To make the icing use your electric mixer set on low speed process the powdered egg white and warm water until all the water is included, about 2 minutes.  Add the sugar and lemon juice, blend on high speed until icing is smooth, about 5 minutes. Divide icing evenly in 5 bowls.  Tint remains bowls of icing pink, yellow, blue and green; spoon each color into a large plastic bag and snip off one corner for piping.  Use the tinted icing, pipe an outline onto each cookie then fill in with the base color, spread evenly.  Let icing set until dry.

Place reserve white icing in a pastry bag with a fine tip. Pipe designs on cookies. Let icing set until dry. Affix skewers onto the back of each cookie with the remaining white icing, let dry. Arrange bunnies in a box or basket. Yum Yum!


Saturday, February 17, 2018

Sicilian-Style Vanilla Gelato

I just got my new ice cream maker and can’t wait to make some gelato. I just decided for my first try to make an easy vanilla gelato.

Ingredients:

2 1/4 cups whole milk
3/4 cups heavy cream
1 vanilla bean or 3 teaspoons vanilla extract
3/4 cups granulated sugar
2 tablespoons corn starch
1 egg yolk, from a large egg

Directions:

In a saucepan pour 1 1/4 cups of milk, the cream and the vanilla. Warm over medium heat until it just starts to bubble.

In a small bowl whisk the remaining milk, sugar and corn starch. Take the warm milk mixture and gradually add it in the corn starch mixture. Return it to the saucepan to medium heat and cook, stirring often until sugar has dissolved and thickens slightly, 6-8 minutes.

In another bowl whisk the egg yolk until pale and slightly thickened, about a minute. Temper the egg yolk by slowly pouring a ladleful of the hot milk into the yolk, whisking constantly, then pou the yolk mixture gradually back into the saucepan and whisk to combine.

Remove from heat, let cool to room temperature, then refrigerate overnight to infuse the vanilla fully. Next day remove the vanilla bean (if used) and pour the now custard through a fine mesh strainer. Pour into the ice cream maker, press the gelato button and freeze according to manufacturer’s instructions. Stop when icy, but still soft. Serve right away or freeze until firm, about 2 hours. If frozen, take out and let sit for 10-15 minutes before serving. Yum Yum!

Friday, February 16, 2018

Cooking with Pressure: Broccoli and Cheese Soup

I’m going to make this broccoli and cheese soup in my mini Instant Pot, but I’m sure any pressure cooker will work. I love Panera’s broccoli and cheese soup, but it can be pretty expensive. Walmart carries a 16 oz for 3.98, while Sam’s Club has a 32 oz tub 2 pack for 11.98. Meijer sell the 16 oz for 4.99! Note to self: compare more prices with Meijer. I always feel prices are a little high in that store. Buy more ar Sam’s

I’m going to try to make a version of their soup, but first I need to break down the ingredients and I will not be adding any preservatives, as they use a Nisin preparation for their food preservative. I do not know if this affects the taste of their soup.

The way a company lists their ingredients is the 1st ingredient is used the most then down the list to the least used ingredient. In Panera ingredients milk is used the most and hot pepper sauce is last so there isn’t very much of it. Going through their list of ingredients it’s:


1.  Milk
2.  Chicken Stock
3.  Water
4.  Broccoli
5.  Pasteurized Process Cheddar Cheese
6.  Heavy Cream
7.  Carrots
8.  Corn Starch
Then less than 2% of:
9.  Onions
10. Seasoning
11. Butter
12. Dijon mustard
13. Hot pepper sauce
14. Nisin preparation


So, now that we know their ingredients, what ingredients will you use? All of them or just some and tweak it with some ingredients of your own.  Here’s what I did.

Ingredients:

2 cups of milk or heavy cream
8 oz of cheese, preferably cheddar, but you can use Monterey Jack, pepper jack, colby, Parmesan or even kraft American slices.
3 tablespoons butter
1 small yellow or white onion, diced
1 clove garlic, minced
1 head of broccoli, cut into florets
3 cups chicken broth
1 cup shredded carrots
1 teaspoon Dijon mustard
1 teaspoon dried dill
1 1/4 teaspoon salt
1/2 teaspoon ground pepper
1 teaspoon hot pepper sauce, optional

Directions:

Turn on you Pressure Cooker, if you are using the Instant Pot press the sauté button. When it gets hot add the butter, once melted add in the onions and garlic. Stir and sauté until the onions are translucent, about 2-3 minutes. Cancel the sauté. Add in the broccoli, chicken broth, carrots, dill, Dijon mustard, salt, pepper and hot pepper sauce (if you are adding or you can add this at the end). Put the lid on your pressure cooker making sure the steam valve is off or secured. Pressure cook for 15 minutes, then use the quick release method. Add the milk or heavy cream, stir to combine. Ok so you still need some heat to melt your cheese. With the Instant Pot put it on sauté then add the cheese and stir until it’s melted.  With the XL you just need to make sure it’s on. Taste test your soup after the cheese has melted to see if it needs any additional seasoning. Serve Yum Yum!


Thursday, February 15, 2018

Chocolate Hazelnut Cake Rolls

In order to make these Chocolate Hazelnut Cake Rolls you need to make the hazelnut paste first. You need 3 cups of skinned hazelnuts and 2 tablespoons of safflower oil or any other neutral tasting vegetable oil. If you are using a powerful blender, such as a Blendtec or Vitamix omit the oil unless you feel you need it. For most blenders or food processors, pour in the 2 tablespoons of oil.

Preheat your oven to 350F and spread the skinned hazelnuts on a rimmed baking sheet. Bake 20-22 minutes until they are dark and almost smoking. Add the warm hazelnuts to the blender to make a smooth paste. Occasionally scrape down the sides to keep the nuts moving toward the blade. Add more oil if needed. Continue until you get a smooth paste.

PS: if you need to take the skins off the hazelnuts, Toast them in a 325F oven for 15-20 minutes, then rub the skins off with a towel.

You’ll need a Vitamix or comparable blender and a KitchenAid stand mixer or any mixer with a whisk attachment.

Ingredients:

Filling:
9 oz semisweet chocolate 72% cacao
1 cup hazelnut paste
1 cup powdered sugar

Cake:
3 large eggs
3 tablespoons sugar
2 teaspoons honey (clover or orange blossom)
1/3 cup plus 1 tablespoon cake flour, sifted

Coating:
16 oz semisweet chocolate 72% cacao
3 tablespoons safflower or other neutral tasting vegetable oil
6 oz of white chocolate
1/2 cup finely chopped raw pistachios

Directions:

Filing:
Melt the chocolate in a metal bowl set over but not touching simmering water in a saucepan.


Stir until smooth then remove the bowl from the heat to cool until it’s neither warm nor cool to the touch. Stir in the hazelnut paste until evenly combined. Sift the powdered sugar, mixing it in until you can’t see it any longer. Let stand, uncovered, until thick and spreadable like a nut paste.

Cake:
Preheat the oven to 350F with the rack in the center of the oven. Line a 11”x17” rimmed baking sheet with parchment paper, butter and flower the parchment paper.

Beat the eggs, sugar and honey in your stand mixer with the whisk attachment for 15 minutes, begin at medium speed and increase to high when it’s blended. Sift the flour over the bowl 1/3rd at a time, gently folding after each addition with a large spatula to completely incorporate the flour without deflating the eggs more than necessary.

Use a small offset spatula to spread the batter in an even layer over the prepared pan. Bake until lightly golden, 8 to 10 minutes. Lift out of the parchment paper and transfer it to a flat surface with the width side (longest) facing you. Trim away the crusty edges, then cut into sections, usually 4” wide. Turn the cake pieces bottom side up.

Always roll while the cake is warm, so check your filling. If it’s thin stir briefly over a bowl of ice until thick and spreadable. Spread filling evenly over each piece. Then roll up from the width side. Transfer the rolls to a baking sheet, cover with plastic wrap and refrigerate for at least 15 minutes or freeze 5-8 minutes to firm the filling. Trim the ends and cut into three equal segments. Return to the lined baking sheet, seam side down,

Coating:
Melt the chocolate with 2 tablespoons oil like you did before. Turn off the heat but keep over the hot water to maintain the right consistency for dipping. Place a rack over a bowl and put the rolls on the rack. Pour the chocolate over the rolls, using a small offset spatula to even out the chocolate. Return the chocolate covered rolls to the lined baking sheet and refrigerate to set at least 30 minutes.

Melt the white chocolate with the remaining 1 tablespoon of oil (same way). Put the pistachios in a bowl. Dip the ends of the rolls in the white chocolate then the pistachios, transfer the rolls to a newly lined baking sheet. Refrigerate to set, 15-30 minutes. Yum Yum

Your small offset spatula looks like this:


Wednesday, February 14, 2018

Homemade Pistachio Cream

I have this craving for pistachio cream. I’ve looked in all the major stores in my area; Kroger, Meijer, Walmart and Needlers, but no luck. So, my choice is to make my own homemade pistachio cream or buy some on Amazon.

To make homemade pistachio cream you’ll need a food processor, but I think you could also use a Ninja Or Vitamix blender, or any other powerful blender.

Ingredients:

1 1/2 cups pistachio nuts
2/3 cups sugar
1/2 cup whole milk

Directions:

If you bought your pistachios in the shell you’ll need to blanch them in boiling water for 2 minutes. Drain and rinse under cold water. Pat dry with paper towels and remove shells.

If you bought peeled pistachios you’ll still need to blanch them. Once peeled and blanched put the nuts in a food processor with the sugar and pulse, scrape sides and pulse again. Add the whole milk and process until smooth and creamy. There may be some pistachio bits left, but that’s ok.

Use your homemade pistachio cream for your gelato. See my White Chocolate Gelato with Pisachio Cream Swirl


In a croissant

Combine with whipped cream for a cake filling
Mix with yogurt and ricotta cheese
Topping for eclairs


Macaroons and cookies